Week 1 The wire project

During this week we focused on the concept development for the piece, the logistics on how we were going to develop the project, and how the introduction of 2d drawings would fit with the overall concept.

I focused on the concept art for the wire sculpture/drawing and the final look of it.

20160302_140905


For week two I have mostly finished with my work with the litho crayon. Even since this photo I have embroidered each of three figures and animals in the image. We plan to have yarn connecting from the images to the interior space of the gallery and to each other.

David Spriggs

David Spriggs is an artist who has been showcasing his works with layers since about 2001. He has worked on a variety of media such as glass, acrylic, and transparent film, using acrylic paint or engraving to draw pieces of the final image. By drawing only parts on each sheet, it creates a depth that recedes both visually and physically from the viewer. His use of lighting in each piece can often make them appear to be holograms within the film ‘screens’ that often occupy a very large space. Some works fill an entire room but even the smallest pieces are several dozen cubic feet. Each illusion, though, only works from certain angles. By walking around a piece, the viewer no longer sees a singular image but can distinguish the layers upon which each part of the image lays. Interestingly, Spriggs prefers not to hide the layers of his works, instead letting viewers see all angles of the pieces. This allows them to be seen both as a singular image and as a sculptural form.


https://i0.wp.com/www.davidspriggs.com/wp-content/uploads/2012/07/Spriggs_Holocene_front_2.jpg

Spriggs_Regisole_2015withartist


Dream Team Progress

We left off at the last post with a fully cut demo and hopes for a great project ahead! In the past week we have made lots of progress on the box, the lighting and the gallery  Ωinstallation planning.

The Box:

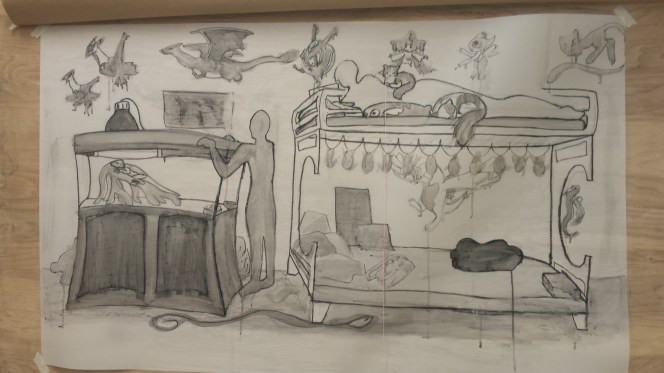
We have all six panels cut at this point. Two may wish to revisit the laser cutter for touch ups or additional detail. upon assembling the cube, we had some difficulties fitting the pieces together but after some sanding everything fits very well! We will not permanently assemble the cube until last minute to allow us flexibility with lighting options.


The gallery:

Currently we are painting a new wall to hang in the gallery! Since our project requires darkness to glow properly, we had to construct a wall to allow enough darkness for the shadow effect to be strong. The wall is made out of two doors joined together with dry wall tape and spackle. we joined the doors with metal fixtures and added more metal fixtures to the top of the door to hang it as an additional wall in the gallery. For the ceiling in the gallery we plan to hang a strong fabric to allow the shadows to be displayed nicely. We are going to put that fabric up tomorrow along with the wall.
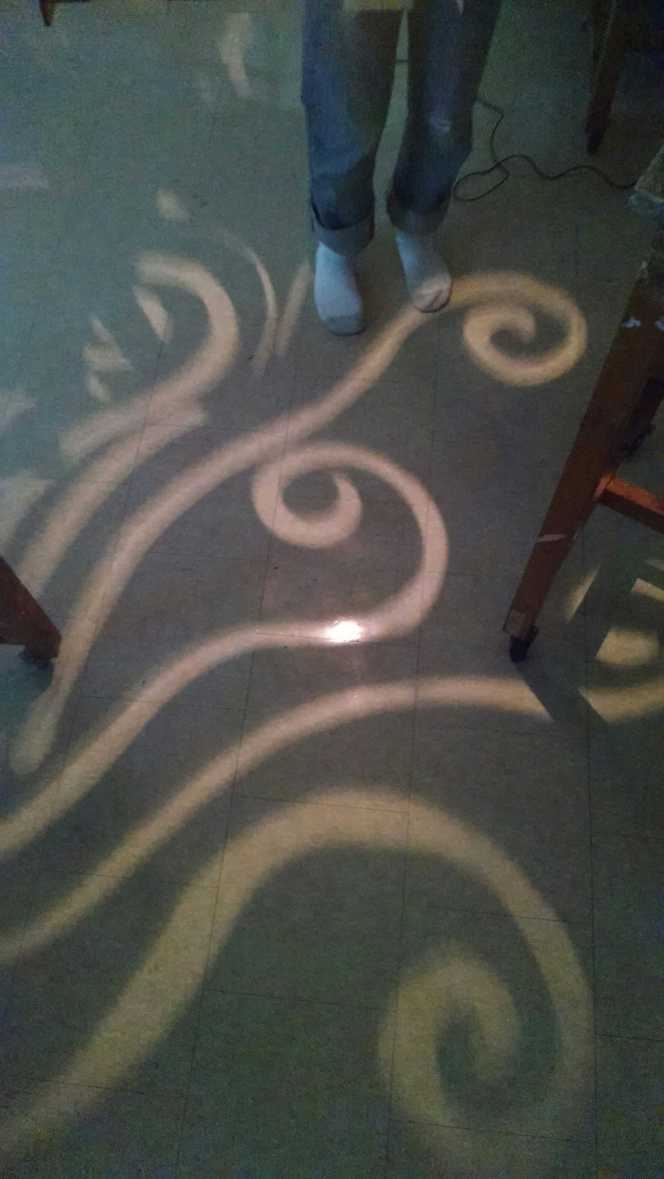
Lighting:

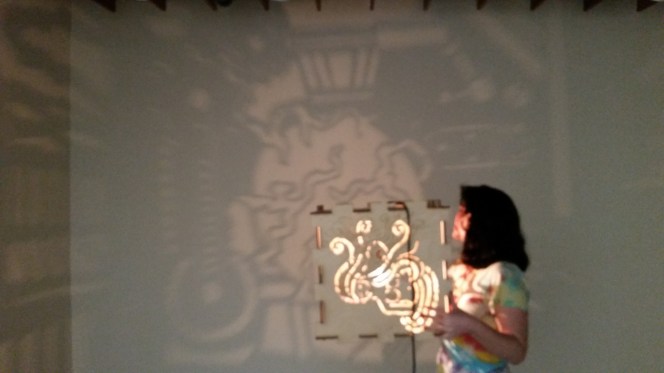
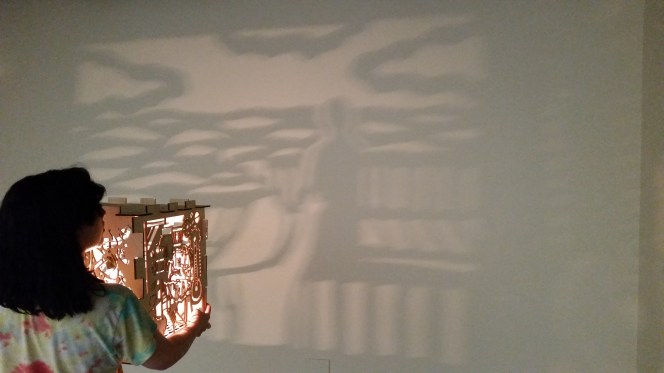
We are still playing with lighting, however the larger cube is making the shadows much easier to distinguish. Later today we will work more intensely with the lighting.

20160313_15000220160313_150020IMG_20160313_14521985120160313_150214

All around:

So far we are on track, we are handling small problem as they arise but we will be very ready for the opening!


Week 2 Group Project Progress

This week, the group moved onto a more constructive phase. We each had the opportunity to cut our panels with the laser cutter, and we began construction on the extra wall that will hang in the gallery. We attatched two door panels together with brackets, and spackled them together. From there, we began priming and painting the wall, as well as assembling the cube and testing the lighting.

We are on a steady roll for the final week!

Progress: Week 2

This week we finally got the wire on Thursday and started wrapping.  Being that it was in its beginner stages I was asked to make more portraits since Javi was wrapping.  This week I made 3 successful portraits that I believe are good enough for the show.  The idea has changed now that we are in the final stretch, and once I am back from vacation we are having a group discussion about it.  But these portraits have been my contribution to the project.

Progress: week 1

For this project week my main focus has been creating portraits of different people.  I asked them to make a face that expressed themselves, and then I drew them as realistically as possible.  No wire yet, so this has been my plan of action, this week I finished 2 highly rendered portraits, and 2 were trashed because I did not like them.  Overall, feeling good about the drawings, and excited to make some more!  Group agreed e would enlarge the portraits and put them on the wall behind the sculpture.

Extension of Personal Spaces

Our project elements wound up being a combination of both mine and Morgan’s; her idea was to work with the figure and use yarn or string as a three-dimensional element to branch off into space, whereas mine was to use messy rooms or personal spaces as a highly-detailed still life on frosted mylar. From this, we developed a method of each of the six of us–Morgan, Ari, Rachel, Rebecca, Mollie, and myself–to include 1) a figure (or implied figure), 2) a bedroom or personal space, 3) ink and grease crayon on a frosted mylar surface, and 4) the use of yarn embroidery in the image that is meant to extend outward somehow.

My work in progress based on the initial thumbnail.

While the concept is a work in progress that we are continuing to develop, we consistently come back to the idea of a personal space/safe haven extending and branching outward into public space, done via a transition from two-dimensional media to three-dimensional. Each of the works is cohesive in our aforementioned “rules”, but remains reflections of the each of us and how we approach creating an artwork.


20160302_140905.jpg

I finally felt as if I had filed my mylar with a good amount of litho creation and began to embroider just after this photo was taken. I have made a few alterations to it as well, coloring the bed frame with black ink to help balance it, as well as a few other darker spots. All the animals are done in satin and all three figures are outlined in thread.

Week 2 of Exhibition Progress- Mylar and Yarn

This past week has been mostly trying to finalize the drawing with litho-crayon portion. I chose a more realistic and linear style, since it reflects myself my general art style. I think it also reflects how I am as a person with characteristics of control and awareness.

I’ve also been working on sewing yarn and string into the Mylar. I’ve been mostly following lines and using the medium to embellish the piece. IMG_20160308_222952898

Photo taken in home studio of progress so far.

IMG_20160308_223024411IMG_20160308_223152765

Coda is hard to impress.