Ivana De Vivanco is a Chilean sculptor and installation artist. She was born in Santiago, Chile, in 1981 and currently resides in Berlin, Germany. De Vivanco’s sculptures are mainly made from materials such as wood, metal, resin, and ceramics. Her works often incorporate elements of nature, such as branches, leaves, and stones, and explore themes related to ecology, anthropology, and the human relationship with the environment. De Vivanco’s installations often involve the use of light and shadow to create a sense of depth and movement within her sculptures. De Vivanco has exhibited her work in numerous solo and group exhibitions in Chile, Germany, Switzerland, and the United States. She has also been the recipient of several awards and grants, including the DAAD scholarship for artists in Berlin and the Fondart National Fund for Cultural Development and the Arts in Chile.
Mijal Zachs is a contemporary Mexican artist. He was born in Mexico City in 1978 and is known for his abstract paintings and sculptures. Zachs studied fine arts at the National School of Fine Arts in Mexico City and has exhibited his work in various galleries and museums in Mexico and abroad.
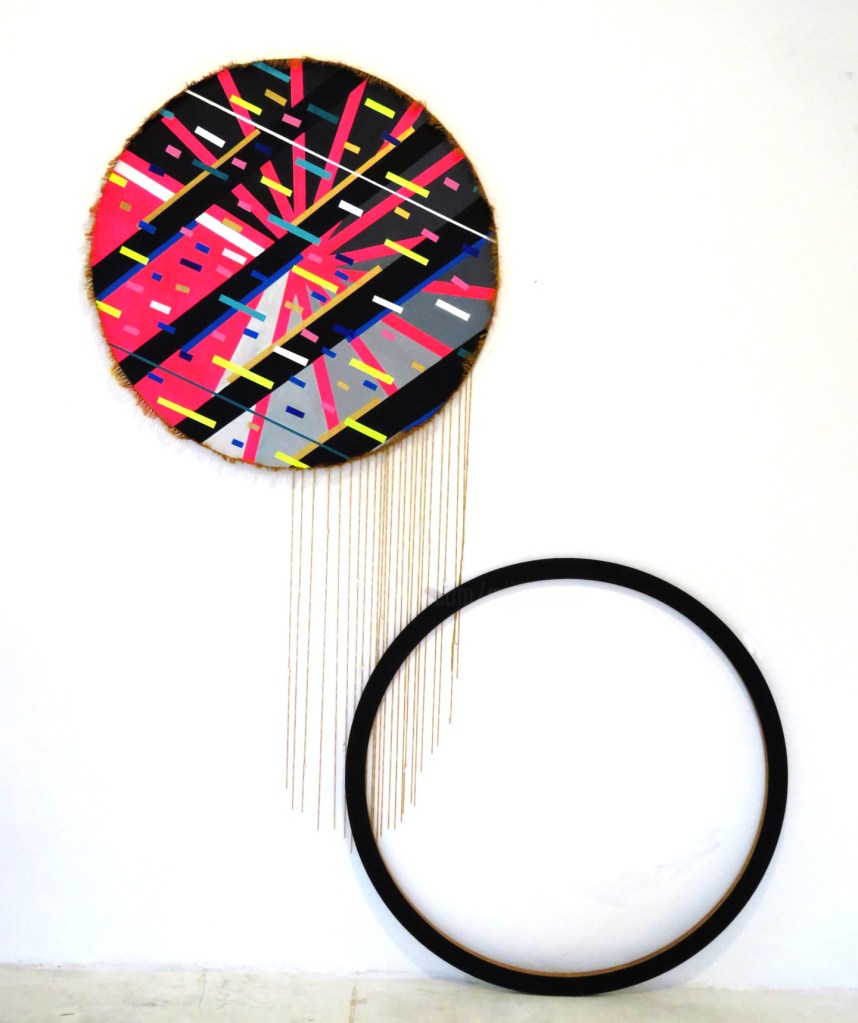
Zachs work often explores themes of identity, memory, and the relationship between human beings and their surroundings. He creates intricate and colorful abstract compositions that incorporate a variety of materials, including paint, wood, and metal. Zachs’ work has been described as both visually striking and conceptually complex, inviting viewers to engage with a range of emotions and ideas.
In his sculptures, Zachs works with a range of materials, including wood, metal, and found objects. He is known for creating large-scale sculptures that incorporate intricate patterns and shapes, often using repetition and layering to create a sense of movement and depth.
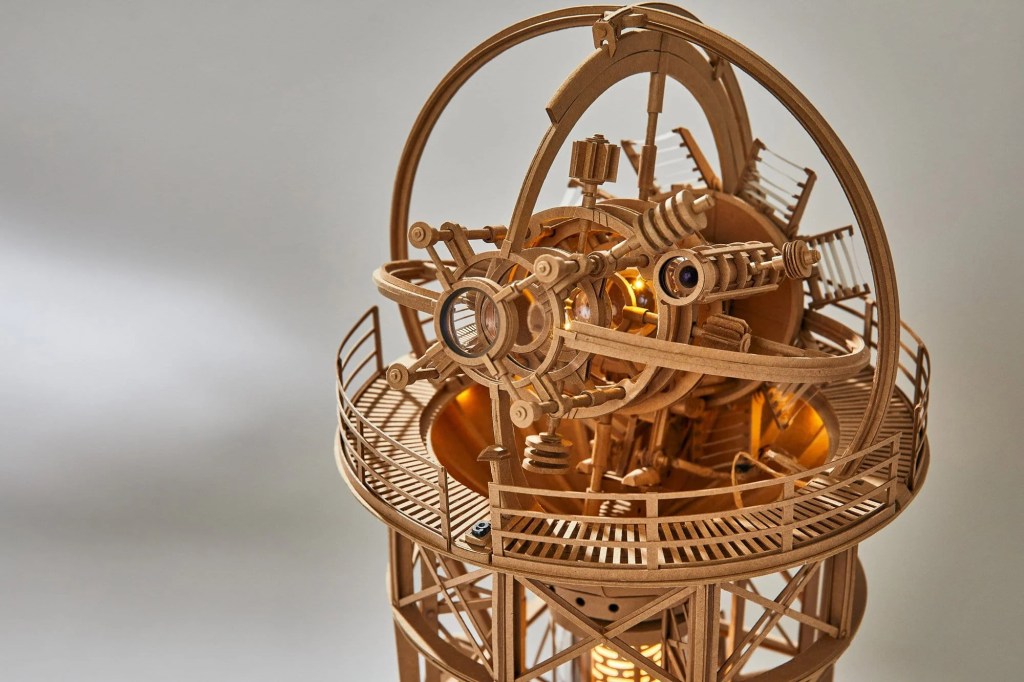
Greg Olijynks is an artist that utilizes cardboard as his medium. He is a Canadian artist who is known for his intricate sculptures and installations made out of cardboard. His works often depict retro-futuristic or science fiction-inspired landscapes and cityscapes, and he uses cardboard to create a sense of nostalgia and playfulness in his art. Olijnyk has exhibited his works in galleries and art fairs around the world, and his art has been featured in publications such as The New York Times and Wired.
In addition to his cardboard art, Olijnyk has also worked as a graphic designer and illustrator. He has created album covers, posters, and other graphics for a variety of clients. He has won several awards and honors for his work, including the Toronto Arts Foundation’s Emerging Artist Award in 2016.
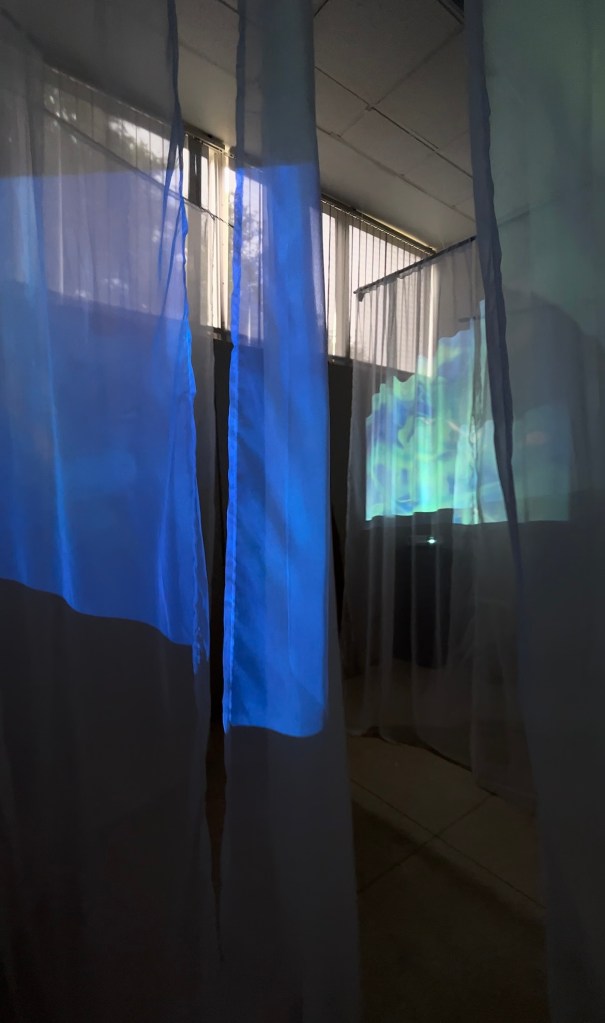
When we were choosing which project to be part of, I was drawn to Adrianas because I really liked her concept of bringing nature indoors and the fact that it incorporated video. We began by scouting out different locations for our instillation. We decided on a room inside the printmaking classroom that was the perfect size for our project, and also had huge windows on one side to add to the nature theme. We then began ordering sheer curtains and metal rods, which we would use as our screen for the video projections. Then, we started clearing out the storage room, which I thought would take us way longer than it did, so that we could begin installing the metal rods and curtains.
The goal of the project was to immerse the viewer in both the peaceful and chaotic elements of nature. Each member of our group went out into nature and captured different footage, such as flowers, trees, lakes, bugs, and the sky. We realized that a lot of the footage was either too short or shaky, so that’s when we came up with the idea of having a chaotic montage with quick cuts in the video to disorient the viewer. During the editing phase, I contributed by adding smooth transitions to the peaceful footage and rough transitions to the footage. We also experimented with audio and visual combinations, we added a soothing soundtrack to accompany the sounds of nature, and at times switched around the audio and videos. After completing the video, we connected the media players to the projectors and set them up on pedestals.
When hearing everyone’s group project proposals for class, I was very excited to join Adriana’s group. What Adriana had proposed, was to create an immersive experience using video and sound. To create Adriana’s vision, the group took over a small room in the back of the printmaking studio and hung curtains from the ceiling going in different angles to create a maze for the audience to walk through. We had two projectors at opposite ends of the room to project onto the curtains to play our video which was compiled of different clips that included the observation of nature.
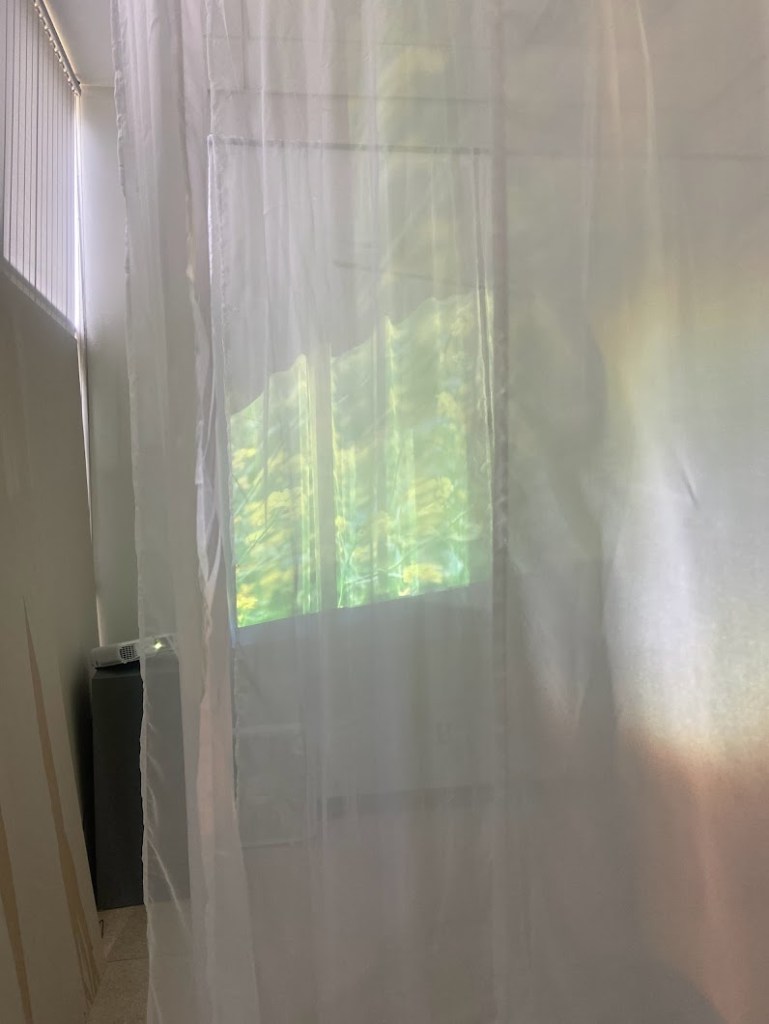
When it came to choosing which project we wanted to work on, I chose this one because I’m a photo major and it seemed the most up my alley. During the planning phase, we ordered the supplies we needed: some sheer curtains and metal rods. Then we got into the shooting phase in which we all shot video footage for the final projection. The concept was to bring nature indoors and create competing senses of both peacefulness and chaos in nature. At first we all shot scenes that were long, quiet and peaceful: i.e. fields of flowers, running water, and clear blue skies. Then during phase two of shooting we decided we wanted to add that chaos element and we all started shooting chaotic things in nature. I tried to focus on bugs and decay for this portion of the project. We then began to compile the footage in premiere. During this period we decided to add smooth transitions to the peaceful portions of the film and add rough and choppy transitions to the chaotic portions. During the editing period we also decided we wanted to mess with people’s senses by making the audio not match up with the clip. This lead to us experimenting with different audio/visual combinations. While the video was being edited we simultaneously were building the installation. We installed the metal rods and sheer curtains in the storage room behind the printmaking classroom. Cleaning that room out for our installation was a process of its own and it took several class periods. After we got all the curtains up we decided to start testing projectors. We brought in pedestals from the hallway to get our projectors at the right height. Once we were happy with how the projectors and curtains looked, the primary focus became getting the film done. Once we got the film done we put it onto the media players and connected those to the projectors. We decided to offset the video the projectors to create a more sensory-warping experience. Overall, This project came out really great and I’m super proud of my team and all the work they put into this. Upon reflection, I would say my greatest contribution to the project was probably the stuff I shot during the shooting phase. I spent a lot of time walking through nature and gathering video and audio clips and I’m glad a lot of them ended up being important to the final outcome of the film.
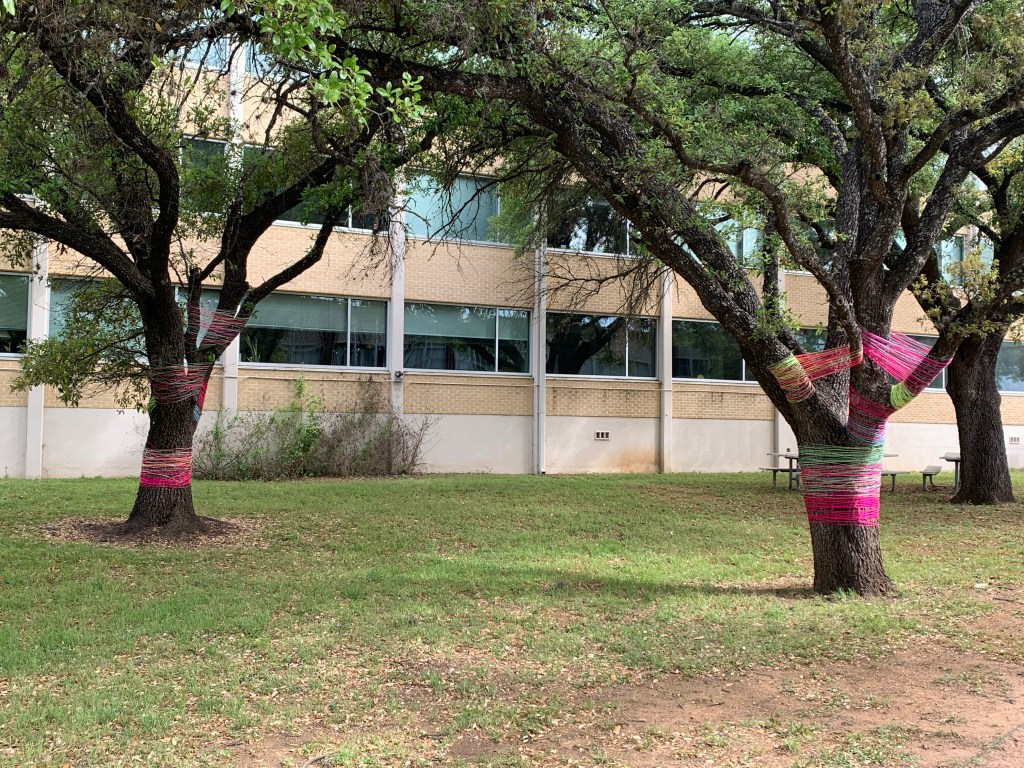
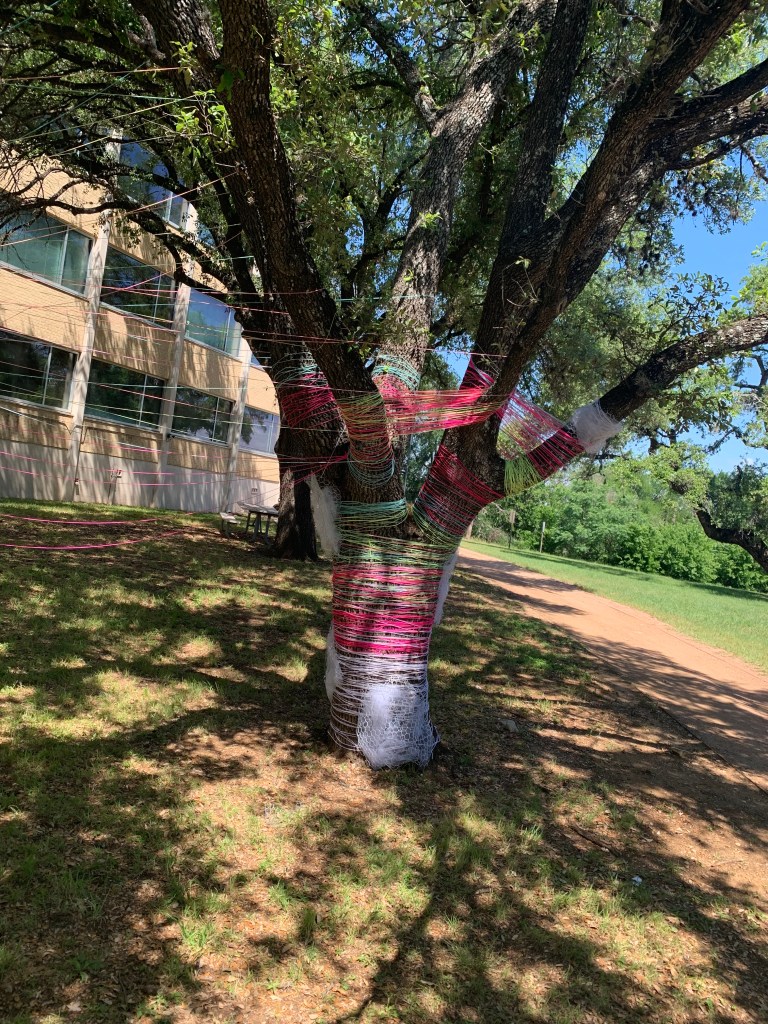
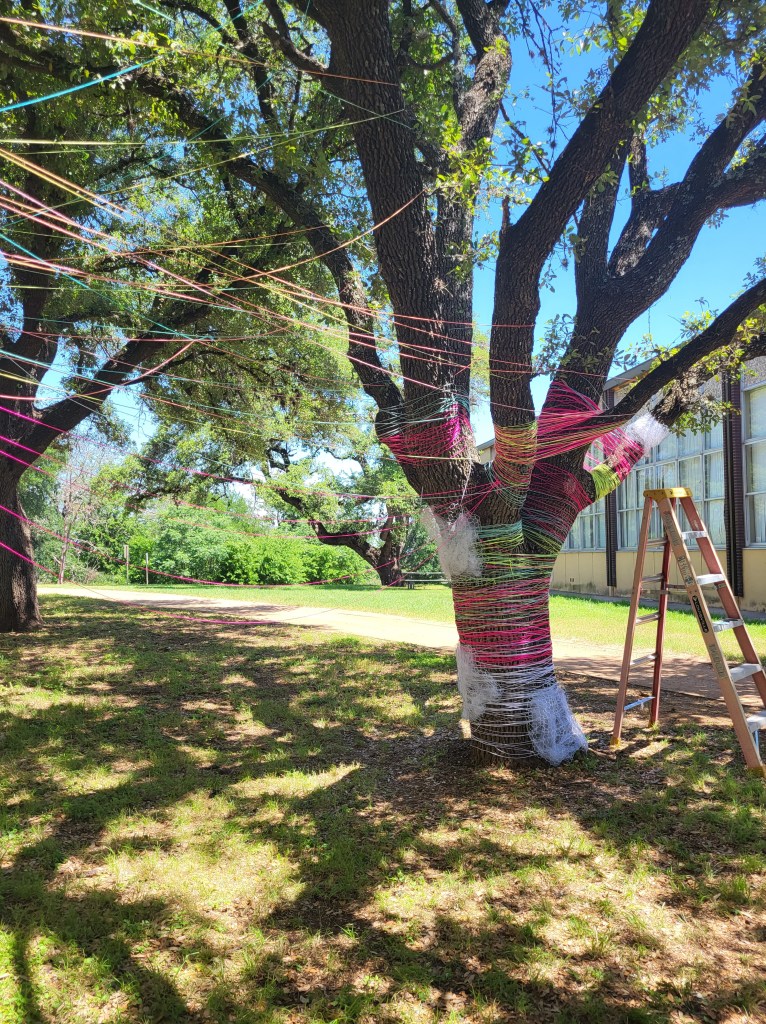
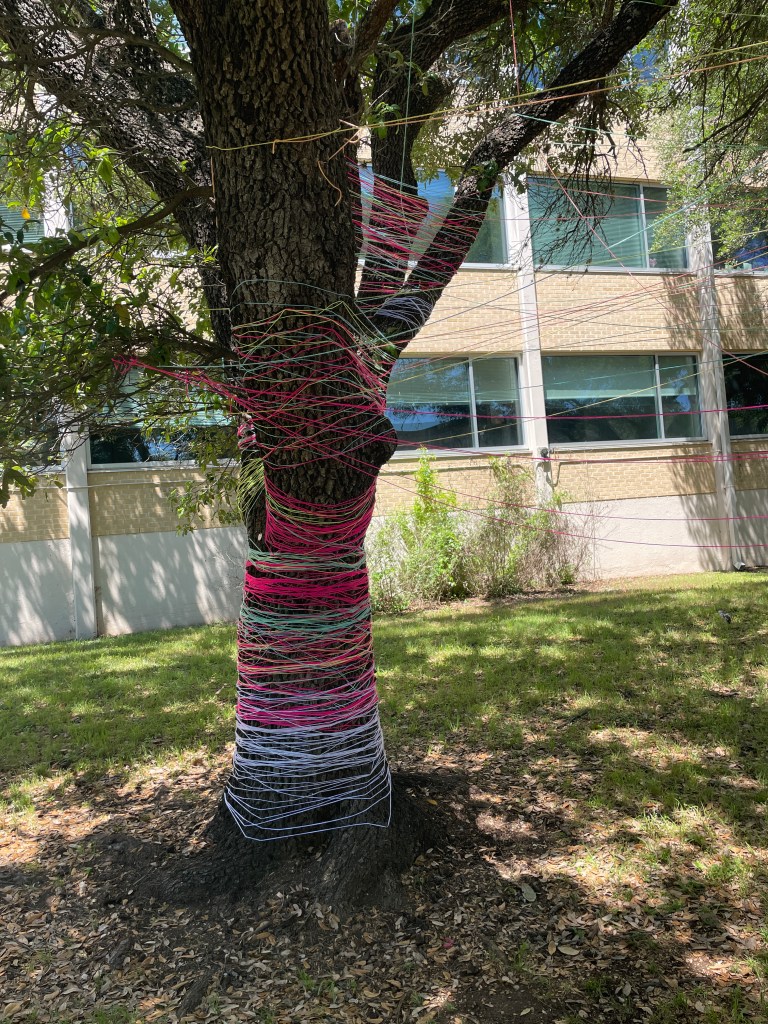
Week 1: Before starting our project, we scouted potential places to put our tree installation. After settling on a place to the side of the art building between two trees, we got together and discussed about the materials that needed to be ordered such as yarn, solar-powered string lights, and UV lights. Then, we took a picture of the location and made a layout sketch of the installation on top of a picture to get a better idea of how we are going to make the trees look. After getting our materials and having a sketch to work off of, we started wrapping some of the yarn around the tree barks. We also did some prototyping with the biomorphic shapes to get a better idea of how we wanted them to look on the trees. Then, added getting more chicken wire and white spray paint to our materials list.
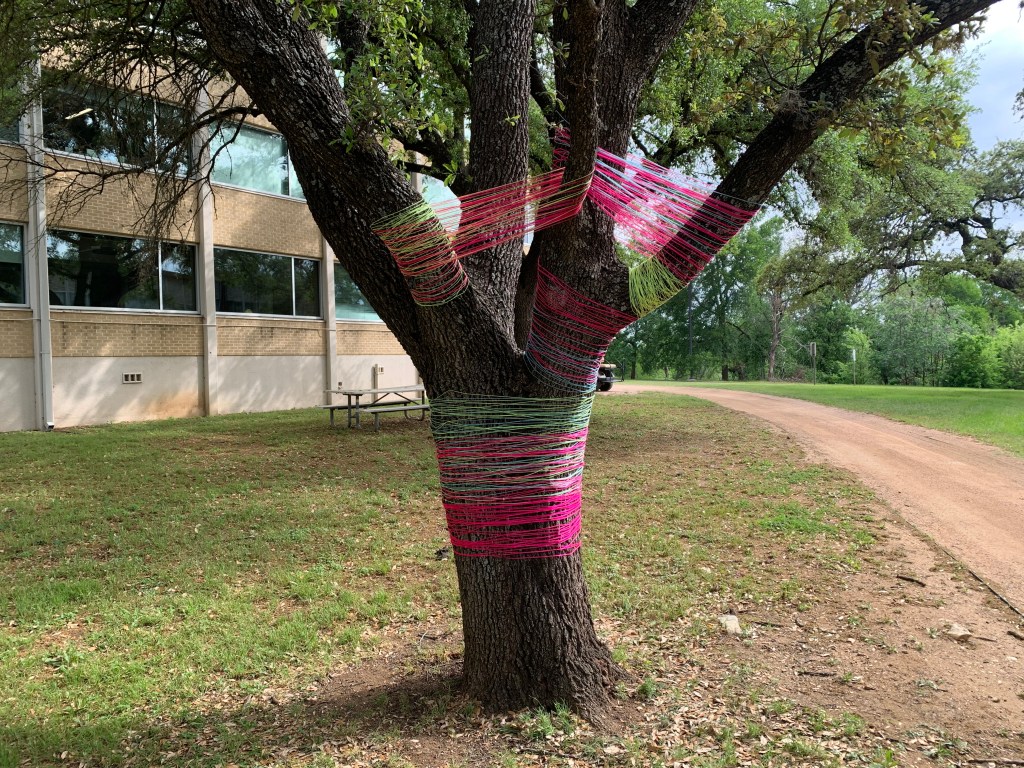
Week 2: By this week, we finished wrapping yarn around the tree barks. Then, we moved on to wrapping yarn around the large branches and started “spider-webbing” the branches together with the yarn to add more interesting details. By the next class, we decided to just finish wrapping the tree branches in yarn and anything within our reach since it didn’t seem like a good idea to go any higher because of the rainy, windy weather that day. Afterward, we ended our work early, and we got more chicken wire and spray paint for the biomorphic shapes to be put on the trees accompanying the yarn.
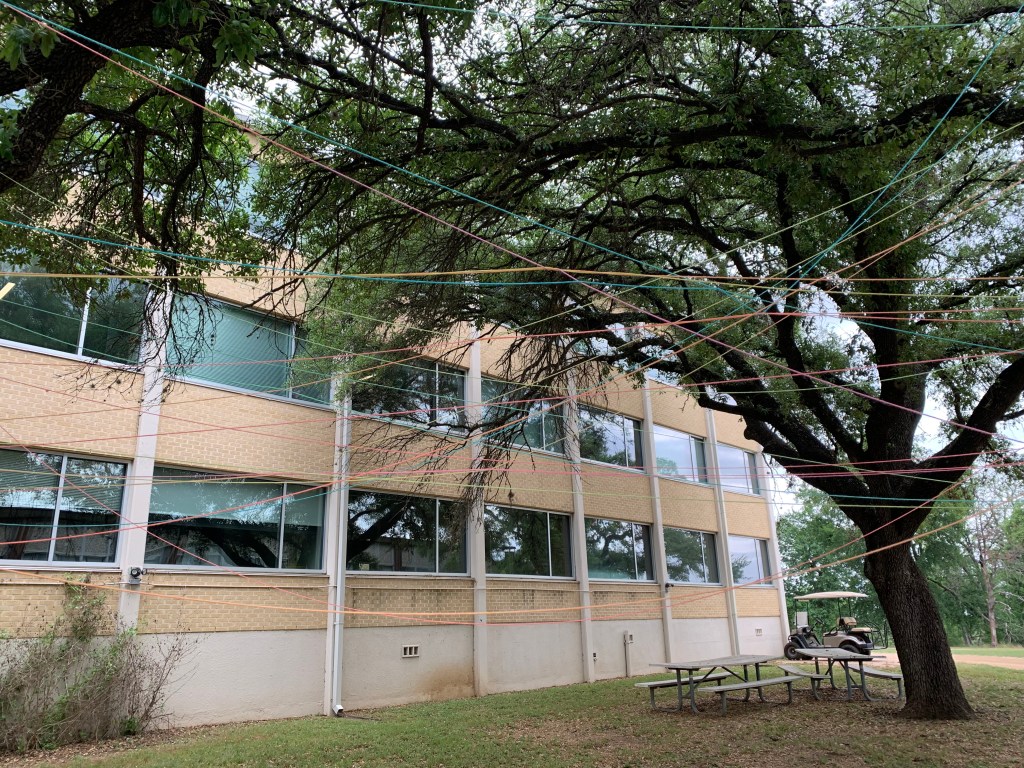
Week 3: Since we weren’t going to be here during the Spring Break, we tried to be as productive as we could be on Tuesday. We spent the day doing some more spider-webbing with the yarn wrapping between branches. Then, we started stringing the two trees together using rainbow yarn to have them hang between the two trees. We would throw the rainbow yarn between the tree branches and around the barks to get the stringy hanging piece.
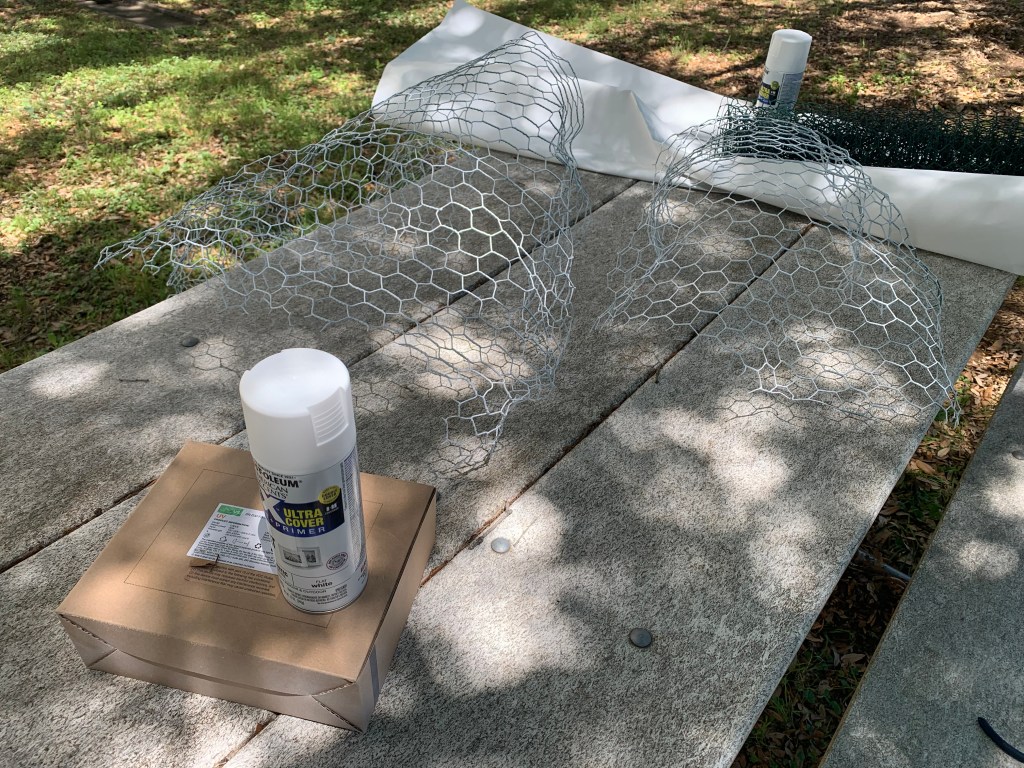
Week 4: We spent this week adding some solid-colored yarn to our hanging centerpiece to go with the rainbow yarn hanging already. Then, we started working on getting the biomorphic shapes onto the trees, so we measured them and put them up to see if they look good and/or needed tweaking. After making a couple of the biomorphic shapes, I started to spray paint them white outside on a large piece of paper as a covering to not get paint on the benches. I managed to spray paint 3-4 shapes before running out of white paint. We planned to buy a few more cans for the next class to finish spray painting the remaining shapes. After getting more white spray paint, we sprayed paint more of the biomorphic shapes. Afterward, we started putting up the shapes onto one of the trees and added some white mesh fabric into the shapes so they popped out more. They look like little clouds attached to the tree which actually looks pretty nice, especially with the yarn acting like the “rainbow” coming from them. To secure the biomorphic shapes onto the trees, we tied a yarn on one end wrapped it around the tree, and tied the other end to the other side of the shape.
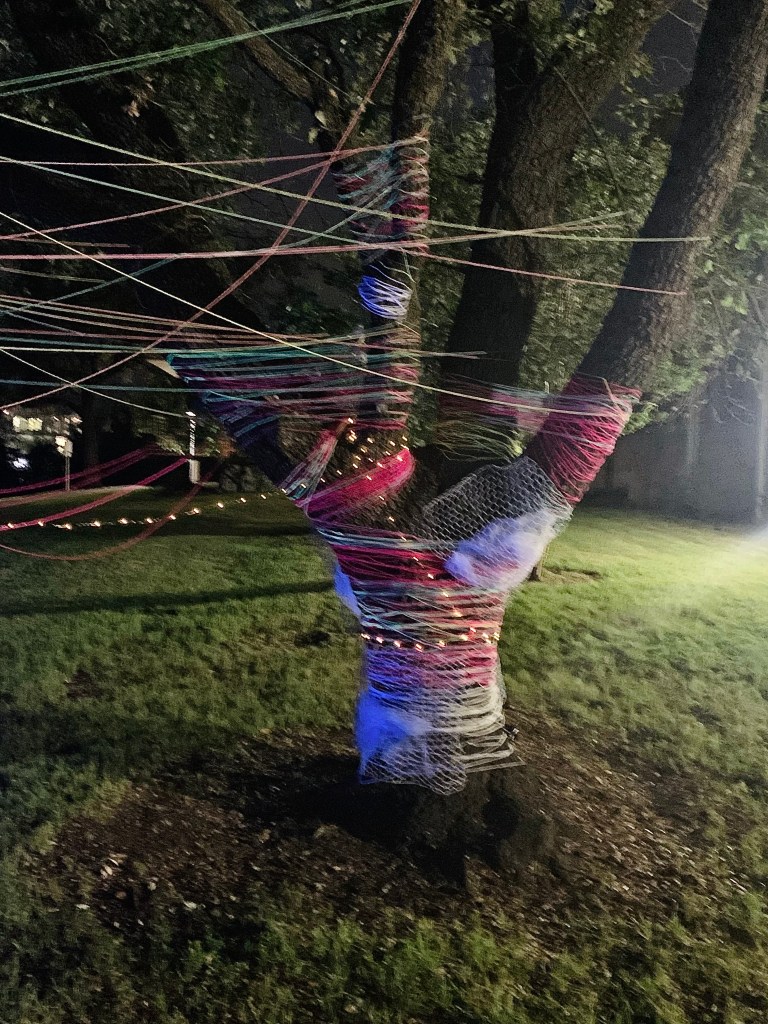
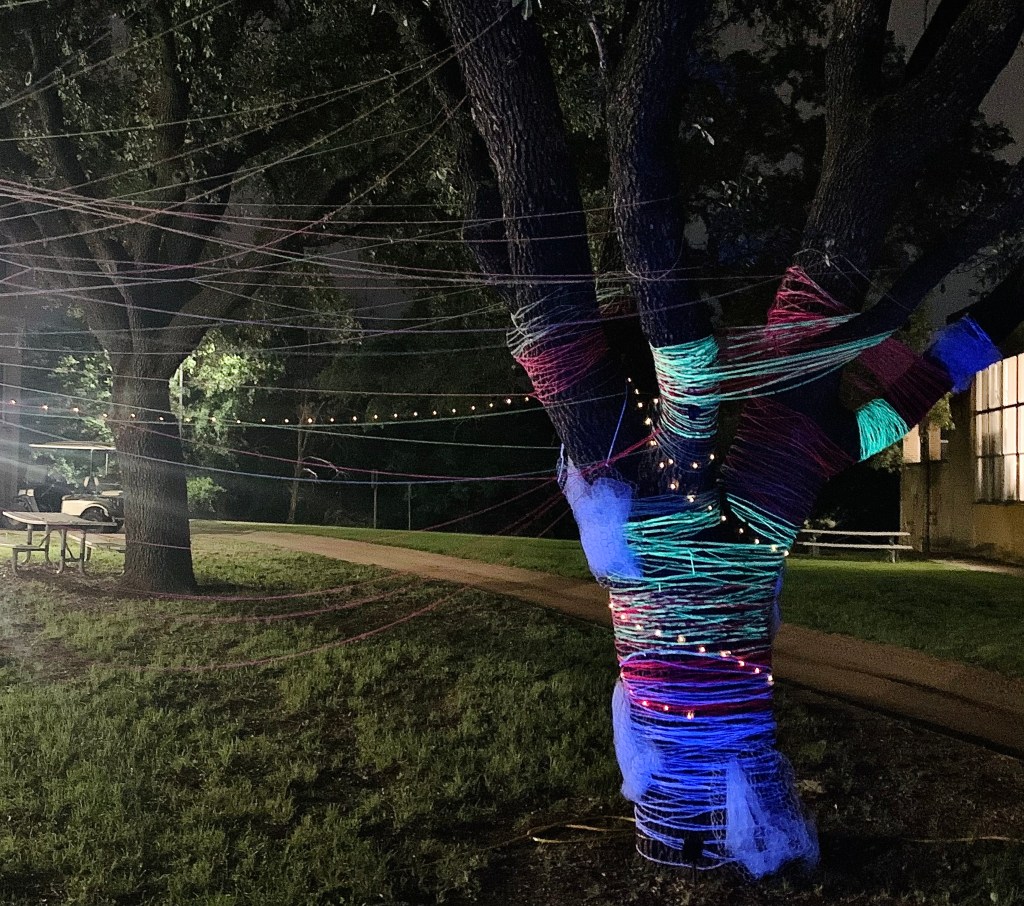
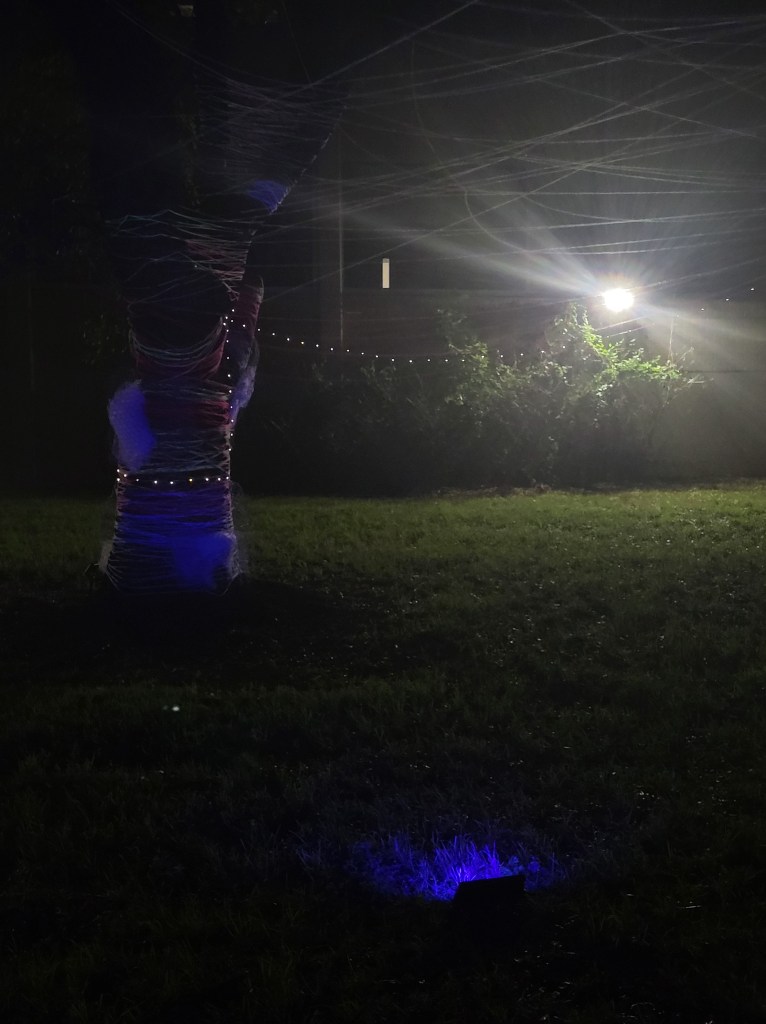
Week 5: By this week, we were pretty much done with our project for the most part with the exception of adding the final white biomorphic shapes to the other tree and securing them onto the tree by tying them around the tree with yarn. Then, we wrapped the string lights around part of the barks before stringing them along with the yarn to hang. We tried to make sure to put the mini solar panels for the string lights in a position where the sun would hit them, so the lights can charge during the day and light up at night. Lastly, we added the UV lights by using the extension cord to better reach the trees and plug the UV lights into them. Then, the project was done.
Personal Contributions: I helped wrapped yarn around the branches (“spider-webbing”), helped with hanging the rainbow yarn between the trees, and spray paint the biomorphic shapes white.
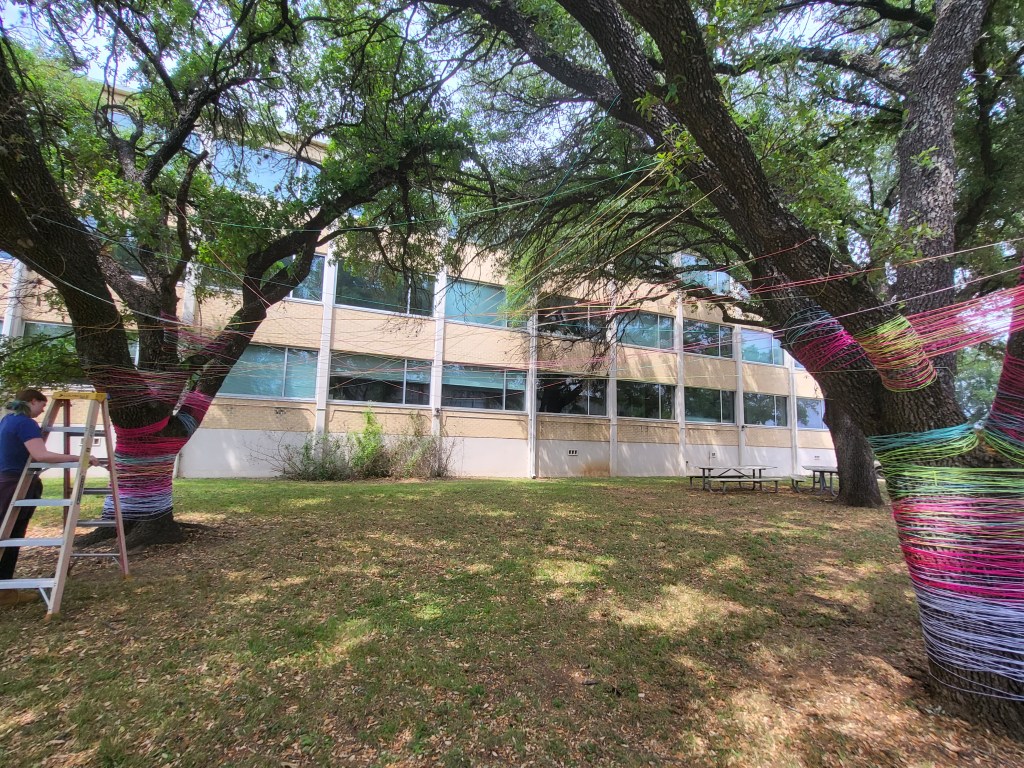
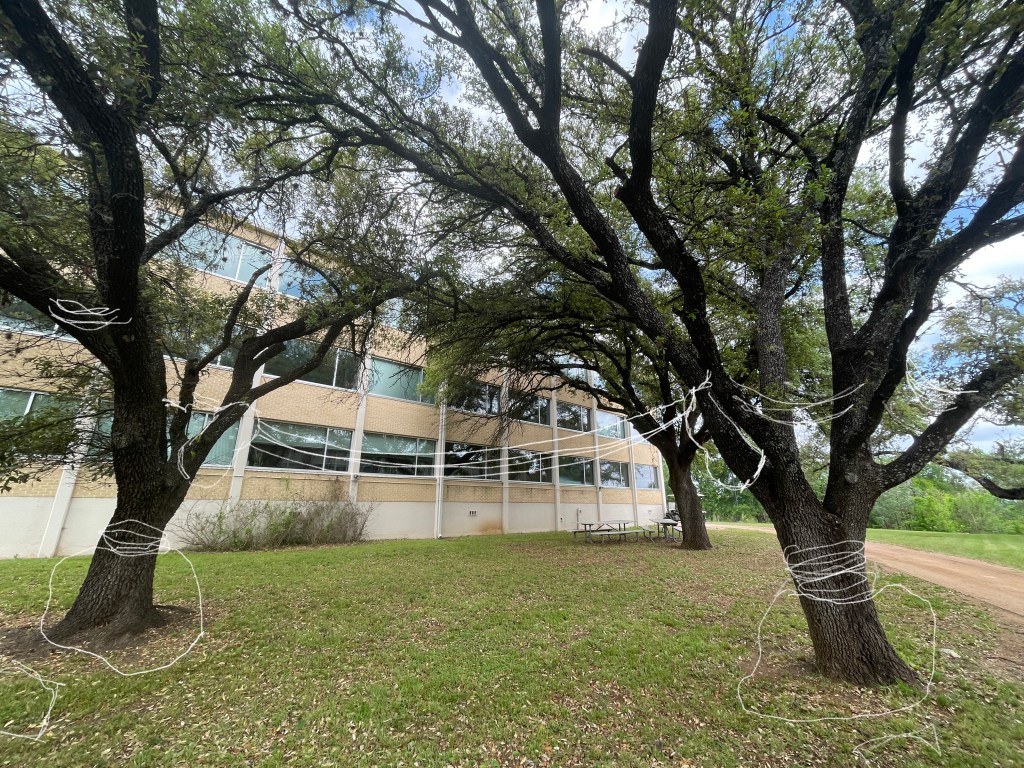
Before we could begin our project, we had to find two trees that were close to each other and tall enough to wrap yarn and lights around the branches. However, we had to find trees that were close to the fine arts building, since we couldn’t go out too far. After we decided on which trees to use, we started wrapping yarn around each tree.
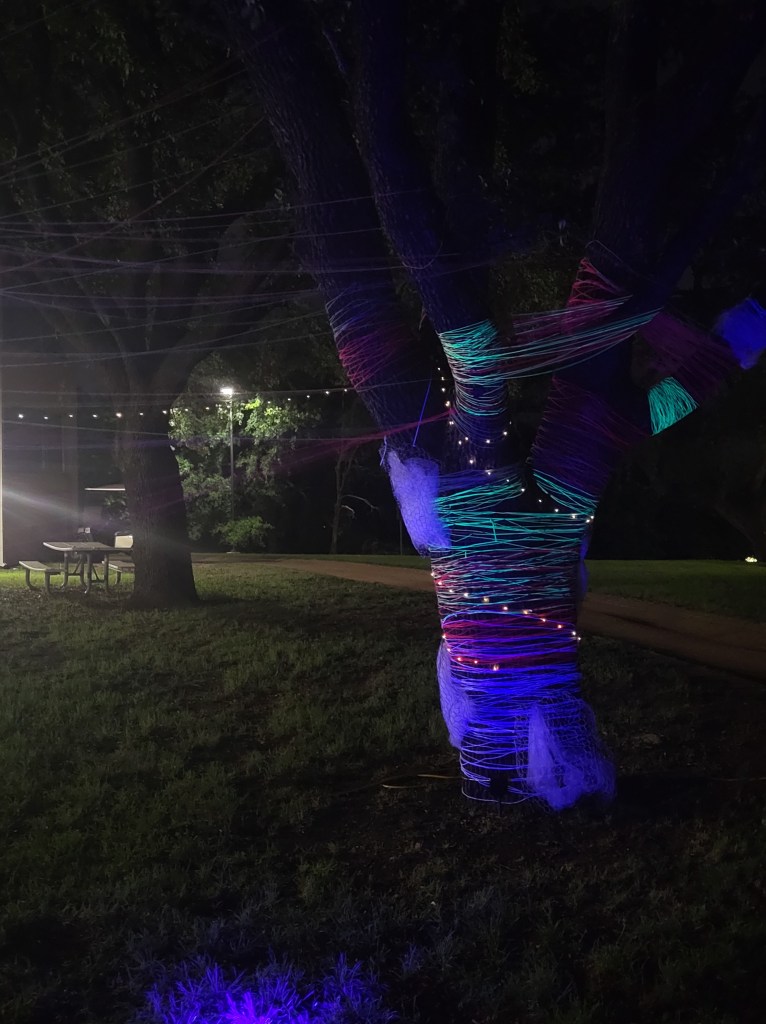
Some of the yarn was neon, so that when we finally plugged in the black lights they would glow in the dark and give more light. Once we wrapped yarn around the tree’s trunk, I decided I would throw the yarn around some branches to make a crazy fun web. I got the yarn stuck a few times, but with the help of my teammates we got it out (No yarn was injured during this project).
Once we were done with the yarn, we started making the chicken wire shapes and spray painted them white. Once they were done drying, my teammates placed each one on a different side and angle of both trees while I gave them yarn to wrap around the shapes to keep them steady. After that, we wrapped the lights around the tree branches and trunk and connected them together in the center of the yarn. And lastly, we plugged in our black lights inside the fine arts building and tested them out to make sure they worked. But as a bonus, for the past few days, I’ve been making sure no one stole the black lights or took the lights and yarn off the trees. I’ve also tested the black lights at night with one of my teammates. My team and I are proud of how this project went, and I hope it doesn’t immediately get taken down once the semester is over.
To start this project my group and I started out by scouting out a pair of trees that we would build our installation on. Once we decided on a location we took a picture of the site and brought it inside to make a rough sketch/plan before we started on the real thing.
From there we began the process of wrapping each tree with yarn. We wanted to cover a good amount of each tree so that it would both be visible during the day and also be better off when it came to having blacklights pointed at them. We used bright neon yarn so that it would glow. After the trunks and branches of the tree were decently covered we began the process of connecting the trees with draped yarn. While some of us continued wrapping yarn others began to work on making the chicken wire forms that we would later attach to the tree.
Making these forms was probably the most challenging part of this process. I struggled to mold the chicken wire in the way I had originally planned. Because of this we had to move a little away from our original sketch and make the forms somewhat smaller. Once I shaped the forms my other group members began to spray paint them white. We did this so they would be more visible once attached to the tree and hopefully would also glow under the blacklight. After the forms dried we began the process of attaching them to the tree. Once attached I found that they didn’t have as much volume as I originally wanted them to so I decided to buy some white tulle that we would then put on the inside of each form.
Our final step was adding the string lights in the tree and also setting up the blacklights.
My contribution to the group was that I wrapped yarn on the trees and made the chicken wire forms.
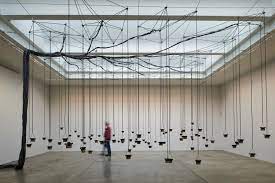
This week I chose to research Michael McLoughlin. McLoughlin is a visual artist from Ireland who’s been making sound work, sculptures, and installations since the 1990’s. The majority of his work examines mechanisms of social interactions and the infrastructures that support it. He explores contemporary art typically through public spaces. His most famous installation is titles An Audio map of Limerick. It comprises of 60 speakers hung from the ceiling that allows the audience to walk through and listen. On the speakers are audio conversations between people in the city, that McLoughlin recorded, representing society’s in its broadest form.
There are two reasons I was drawn to Michael McLoughlin. The first is because of his use of human interaction within his works. Over the past couple years, my interest for human interaction, expression, emotions, and communication has grown strong with my art. Of course I have my own views and opinions about how I think art and interactions are related, but artists like McLoughlin are the very artists I love to research and try to understand. The second reason I was fascinated with him was for his use of audio in his installations. Audio installations aren’t something I’m typically drawn to and I haven’t had much experience with them.