Progress 2: Reflecting Dream

The week before spring break, some of us were preparing and gathering hardware and materials during class time, while the rest of our team members were trying to get the cutting part done so when we came back from the break we would have enough work as we expected it to be. The problem was that we did not have enough wall in order to project all the six sides of the cube. Luckily, Hollis came up with an idea of putting the two door panels together and then painted with white so we can hang it from the gallery’s ceiling to create an extra wall that we needed. On the ceiling of the gallery, we needed to stretch a white sheet so that we could project Drew’s design and not having it blend in with the original ceiling which could be distracting.

12873477_1703242029940386_80959539_o

The picture on the right was when we temporarily put the cube together without light bulb and the one on the left was the finished version.

Cardboard Project

This experiment was reminiscent of assignments from 3D Design but due to the open nature of this assignment I was able to create something a bit less traditional and explorative. I started by creating multiple different pieces that were sturdy three dimensional forms that I could piece together with glue. The materials I chose to use were beer, wine and coffee shipment boxes. A common feature on a lot of these is their preference to design amusing or eye catching marketing to decorate the cardboard box. This provided already colored pieces I could juxtapose with traditional brown cardboard. Some where along the way, as I began attaching different forms, the piece took on a moveable and interactive tone. The orientation shown in the pictures is the most sturdy but it can be manipulated and held to create other viewpoints or meanings. I think that cardboard can be used to create stunning or evocative works of art, however I don’t prefer it myself. I did enjoy using some for my collage, they work well creating a layered aesthetic.


Progress 1: Reflecting Dream

At the first week of collaborative project, I chose to work with Britney’s main concept and idea of using light to project the negative cut-out. Our idea is projecting the unconscious dream onto the wall. The design I created was abstract because I feel more comfortable with non-narrative patterns and to me, I feel like it would be more convenient when working with the software and laser cut. Our concept is to build a laser-cut 18’x 18′ in. cube and project the light from the inside of the box. So every side of the box has its own individual design which represents the dream.


This is a picture of how the design looked like before cutting.

sapuns square


It took 30-45 minutes to cut this 18′ x 18′ wood panel. I loved how it turned out!

IMG_20160302_164118955

I also think that the actual cut-outs are very interesting in terms of the fragments and negative space on the laser cutting bed.

12381000_1703242033273719_2061073495_o


Inner-Twined

On top of the basic principles established in my first post on this project, as a group we were really able to build on our concept and develop its execution. We noticed that there was an increasing prominence of the theme of connection; there was the link between the six of us in our cooperation as well as literally through the connection of yarn from each of our pieces, to the union of dissimilar elements (two-dimensional space versus three-dimensional, personal and public space, representational subject matter and abstract, tangible versus intangible…) We decided on the name “Inner-Twined” for our piece as a play on the word “intertwined” to reflect these connections. (And also because yarn is kind of like twine, and they’re both fibers. So inner-TWINED. Get it?…)IMG_0414

Inner-Twined in early development.

Overall, I’m extremely pleased not only with the end result, but how we all managed to work together well. I feel privileged to have had the chance to work on exhibit before I graduated and with people who were as enthusiastic (or even more so) about the project as I was. I also really liked how the experimental quality of the projects over the course of the class still allowed us all to work in ways that were signature to our style and how we want our work to look as professional artists.

Spring Break Progression

It’s interesting how my contribution to our group’s concept was emphasis on the environment before figures were introduced, and yet mine is almost solely focused on the figure. I went with the first juxtaposition that popped into my head when we were proposing what we wanted to create on the drafting film once our group was settled and haven’t deviated much from it (the original thumbnail was improvised on the chalkboard, then translated into the pencil thumbnail from last post). I think the execution–a figure that is obviously me perched in bed with a ghostly gaze and hand clasped over my mouth with a laptop in front of me–stems from that I have the tendency to get myself worked up without ever leaving the house. Social media platforms and certain blogs can be a source of stress for me, and yet they’re a habit of mine that’s hard to quit.

IMG_0396

As much as I enjoy the end result, I can’t help but contemplate what it would have been like for me to do something more similar to my other group members’ more relaxed, dreamy portraits that featured things that made them happy. Then again, it probably would have been the exact same picture, only with a different expression, as I’d likely be playing a computer game (with my kitty cat sprawled out beside me and all).

Wire Installation Progress

The sculpture continues to be built. As of now we are making more wore and prints of drawings to be placed on the wall. We are currently figuring out how to support the weightIMG_1815.jpgIMG_1814.jpg

Week 2 Yarn Progress

This week, I was finally able to work on my lithography drawing.The concept of the show is making portraits of ourselves in our most private living spaces- the places where we can feel most like ourselves. I started with the image of me lying in my bed, the place that I can feel completely comfortable.

My favorite thing about this medium is the lack of control of the lithography crayon mixed with water. I figured it would be best to accept the drips and let it take over the drawing to some extent. The next issue I had to tackle was incorporating the yarn. I was hesitant to begin with the fear of it ruining the look of the piece. I also needed to find a way to tie the yarn into the concept, so Hollis suggested I go with a dreamy feel. I began weaving the yarn into the vellum so that it would look as if colorful dreams were coming from my head. I really liked how it started to turn out.

IMG_8332IMG_8335

Week 1 Yarn Progress

The first week, our group decided to focus all of our energy on the yarn portion of our project, since we didn’t have the drafting vellum yet. We allotted each person 3 feet by 5 feet of vellum and took a trip to the gallery to see whose piece could go where.

My main goal for that day was to figure out how to do stitch my yarn into the vellum. I have no prior experience with fibers so it took me several tries to get the hang of it. At the beginning I was having issues with the vellum tearing or crinkling up when I poked the needle through, but after a while I got a little better at it. Heather taught me how to do the running stitch, so that is what I stuck with. Even though the trial piece is not much to look at, I was still proud of myself for hanging in there and forcing myself to learn something new and not give up.

IMG_8295IMG_8296IMG_8301IMG_8302IMG_8303

Week 3 Wire process

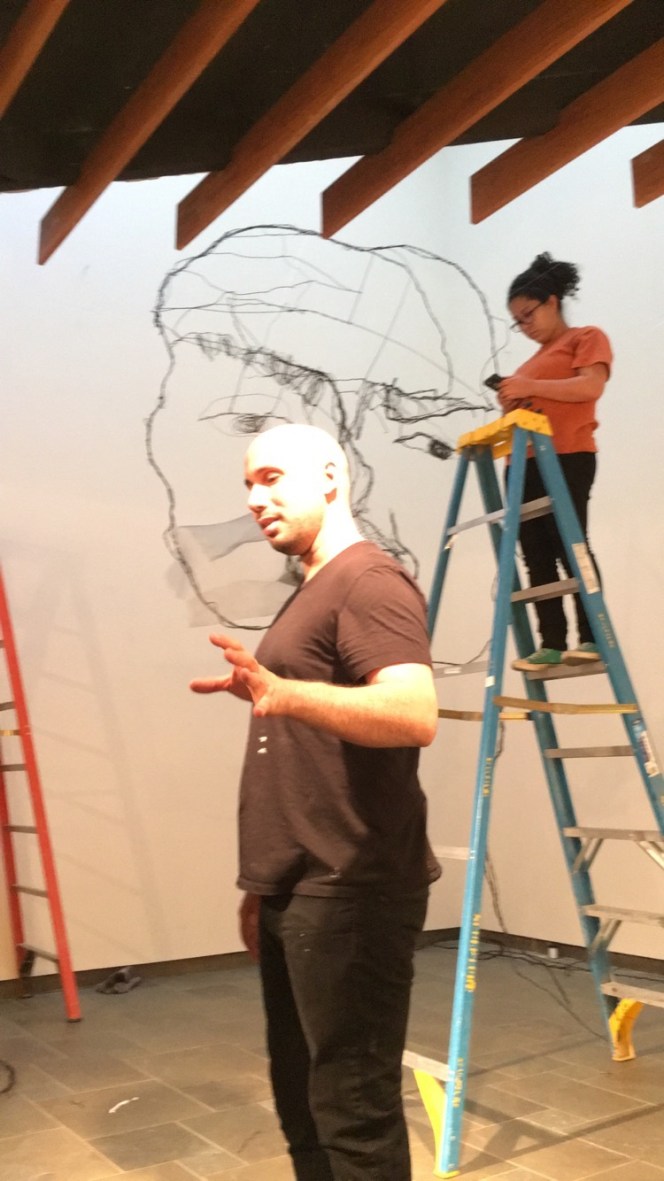
Long days and night of work came through this week. The wire prepping was labor intensive and we came upon a lot of difficulties during the process. One of the first situations that came upon us was keeping proportions right. Once we had the nose develop and continued with the other parts of the face, we realized a few things: 1)That the sculpture was getting too big, and 2)The parts had different proportions whatsoever.

Another situation that came across us was the fact that the wire twisting was very time consuming and we needed to figure out a way to make it faster. Thanks to the collective awesome minds of Gio and Dan, we came upon some great engineering to make that process faster. It was like watching sorcery. It was beautiful.

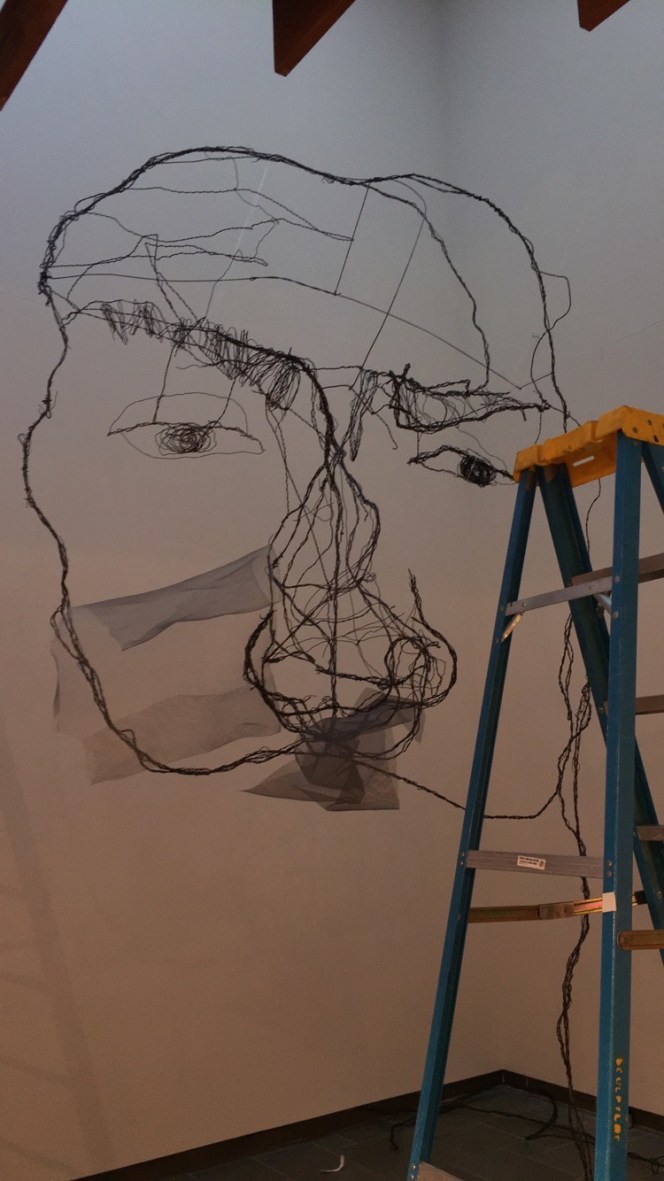
The face started coming together but we started facing another challenge. And that was that we were building from the floor up when the actual piece is intended to be hanging. As of the moment, the sculpture was restructure to be able to distribute the weight evenly and not sacrifice form.

While working I kept on wondering how we could strengthen the the concept of the project and how the piece could have a better readability. How could we deliver the message across. The idea behind the project is how we are more than the struggles and difficulties that we go through; how we are more than what people perceive in the moment. The drawing, the sculpture is just an impression of what we see, of the people we are drawing. This drawings, as good as we could make them, could never come to say who this people really are, who this person is.

This sculpture represents the different layers that makes who we are, but most importantly who we think this person is. Perception. However, I had the idea that instead of posting more impressions of people on the back wall we could instead have statements of people saying who they are. Basically stating that there is more to them that meets the eye, that they are more than the struggles and difficulties that they are going through or they have had. This very small statement would say who they are, saying it to the world how amazing, How kind hearted they are. How much love is inside of them. That there is more to you that meets the eye.

However, I still needed to find a way to incorporate the drawings. On one of my breaks from working in the sculpture i came across a dumpster from a construction. I wonder what if i added broken pieces of rubble to the bottom of the piece, creating a sense that something has been broken and out of all that rubble still the wire (inner structure) is there. How this could be a strong symbol of shattering perceptions. And then I thought about adding the portraits to the rubble. All that beginning space that occupies the sculpture will symbolize perception. Then the back wall will have the statements in a very light shade of grey. This will force the viewer to actually get close and let this people tell them who they are.

What do you guys think?

Week 2 Wire process

On this week  the team split up its responsibilities. Part of the group was focusing on portrait development, while the other help with the wire bending and prepping for the sculpture building.

The first progress critique came in and we had some helpful feedback into how the drawings interacted overall with the wire structure as well as how we could show the portraits in the gallery wall. Overall, there was difficulty understanding how the drawings related with the overall concept and the wire structure.