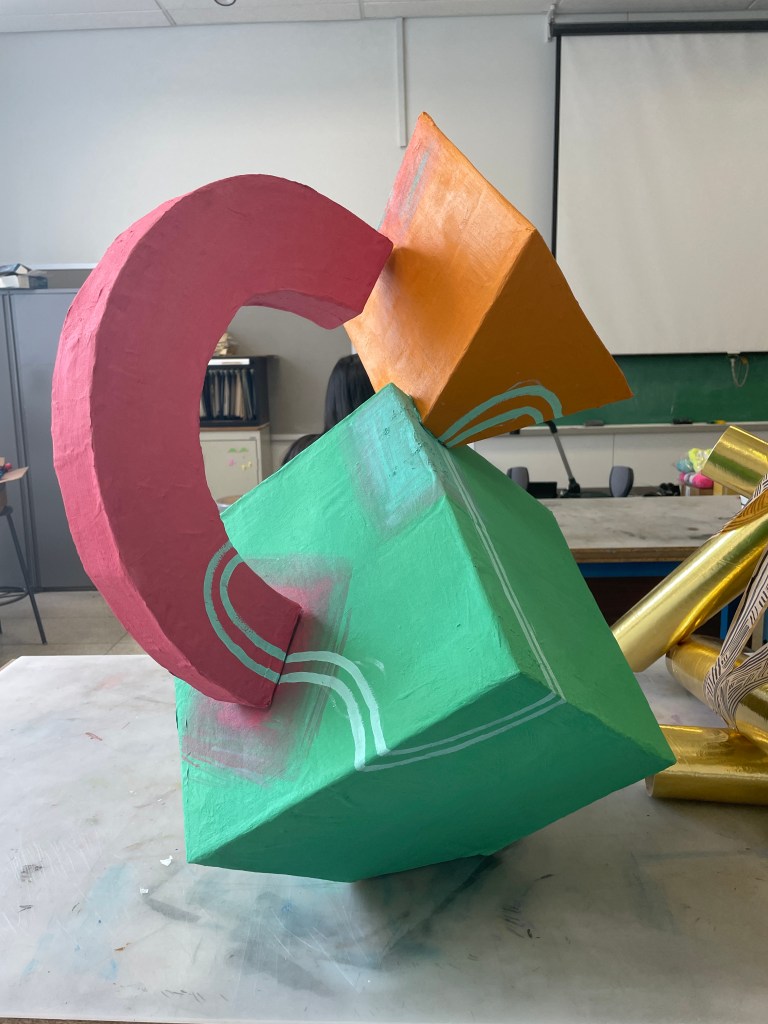
When starting this project the two things that I had in mind was color and balance. I wanted the sculpture to be sort of topsy-turvy. I first started by making the base cube of the sculpture and then cutting a corner of it so that it would be able to sit flat. I then began the process of making the triangular shape and cutting a slot in it that would allow it to sit on top of the cube. Finally I made an arch shape.

From there I began the process of covering the surface of each of the shapes. I put a layer of glue on each side of the shape and then placed a large sheet of paper on top of the glue ( a sort of quick version of paper mache). Once that was done and the glue dried I mixed acrylic paint and baking soda and painted each form.


The final step was assembling the pieces, during this process I had to make some adjustments so that the piece was still able to stand and one side wasn’t too heavy. After the shapes were assembled I painted a set of lines that would wrap around the entirety of the piece.